Home › No till gardening › Creating a no dig garden
Creating A No Dig Garden
The Experiences Of A Newbie
After visiting no dig gardening expert, Ed, who was happy to share his secrets of a successful no dig vegetable garden, I was all fired up to have a go myself.
I wanted this be a real test of the no dig technique so I decided that, rather than using my own garden, I would look for a patch of land that had fallen into disuse and was infested with weeds. Talk about making things difficult for myself!
I put the word out on the village grapevine and before long I had a result. An elderly neighbour, Mrs L, had an overgrown vegetable plot that she was no longer able to tend and she was more than happy for me to use it for my experiment in return for some produce.
In my capacity as 'official no dig gardener' I went round to take a look... and I don't mind admitting that when I saw it my heart sank!
The Site of my First 'No Dig' Garden!
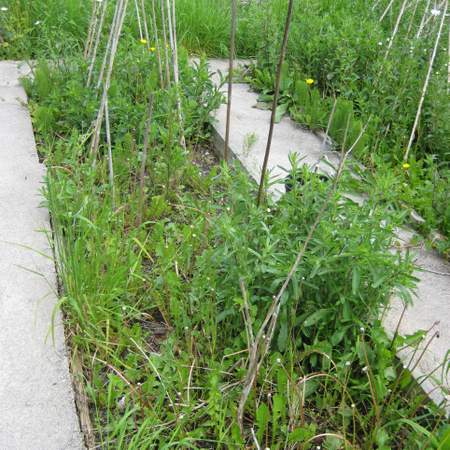
You can see why from the photo. The beds were choked with dandelions, mare's tail and bindweed and the soil was dry and stony with a low humus content.
Mrs L explained that her husband had been a keen gardener but in recent years another neighbour had used the plot to grow a few odds and ends. Nothing had been added to the soil for many years with the exception of artificial fertilizer.
I pulled myself together and told Mrs L that it was perfect!
Sourcing Sheet Mulching Materials
The next step was to gather together all the sheet mulching materials I would need and I was determined that they should be a) local and b) completely free - Ed would be proud of me.
In the end this part was really easy. The 'green' materials were no problem as I am an enthusiastic composters and I reckoned that I would have enough finished and half finished compost for two of Mrs L's vegetable beds.
Now for the 'browns'. A quick stroll around the village and I was sorted. A local workshop had any amount of cardboard that they were happy for me to use and a visit to the local livery yard produced two large bags of chopped wheat straw that nobody wanted. They had just had their muck trailer emptied but said that if I wanted any horse manure in the future I was more than welcome.
That was all the sheet mulching materials taken care of. Things were going really well. So well, in fact, that I had a crisis of confidence and phoned Ed.
'Ed, are you sure this is going to work?'
'For goodness sake, a no dig garden is like anything else in life - if you don't try it you'll never know. The main reason for people failing with no dig gardening is that they never even make a start. Just get on with it!'
Creating the 'No Dig' Garden Beds
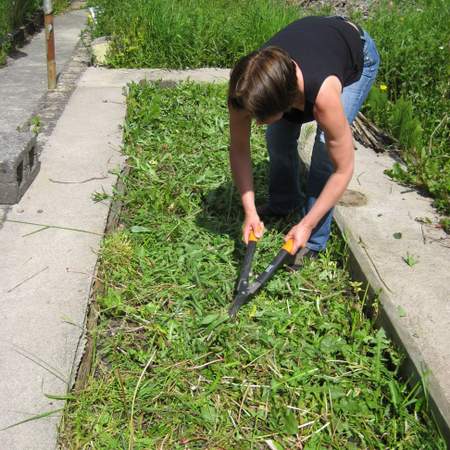
Feeling suitably chastened, I determined to follow Ed's advice and headed round to Mrs L's.
I resisted the urge to start digging out the weeds and just chopped them down with a pair of shears, spreading the cuttings out over the beds.
Mrs L appeared at this point with a cup of tea and a slice of lemon drizzle cake and I could see that she had her doubts but she was far too polite to make any comments!
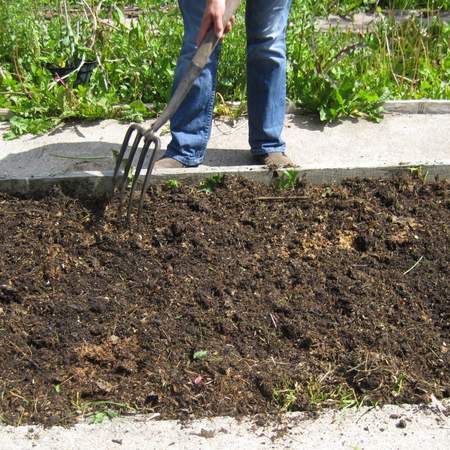
After cutting down the weeds I applied the first layer of mulch - a couple of inches of finished garden compost spread out evenly over the beds.
If I had been able to get any rotted manure I could have used that instead.
I was pleased to see that the compost already contained some worms so they would be able to get to work on my no dig garden right away!
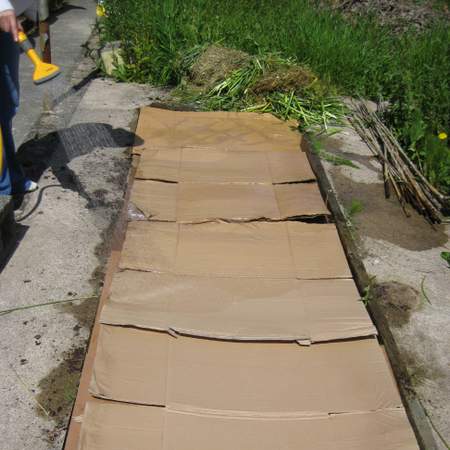
Next came the layers of cardboard: two sheets deep with an overlap of at least 15cm (6in) to exclude the light.
By a stroke of luck many of the empty boxes fitted perfectly and it was simply a case of removing any packing tape and staples and collapsing them.
The little bit of cutting needed was easily accomplished with the aid of an old serrated kitchen knife.
I'd brought along my own garden hose to dampen the cardboard as Ed had advised but I found the water was just running off so I used the knife to very lightly score the sheets taking care not to cut all the way through.
Once the cardboard was moist, it flattened down to give a good level base for the next layers.
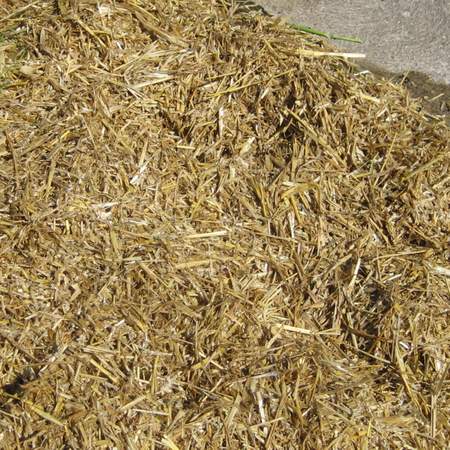
I had decided to use the chopped straw for the next layer but ran into some difficulties because it was a breezy day and bits of straw were flying all over the place.
I remedied that by running the hose over it while it was still in the bag.
If you have a choice make your no dig garden beds on a windless day!
One bag of straw gave a layer about 20cm (8in) deep over the whole bed.
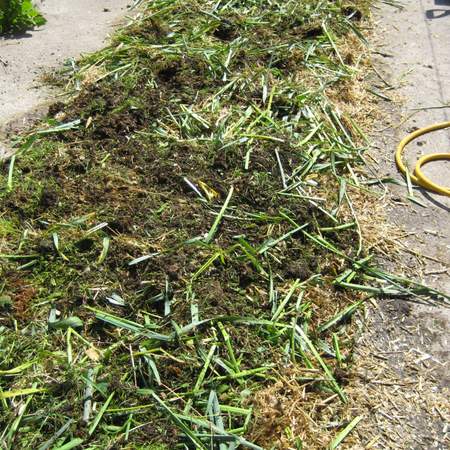
Finally I used the half finished garden compost that I'd brought with me. It was the usual mix of raw vegetable and fruit scraps, plant material, grass cuttings and litter from my daughter's rabbits.
I had enough for around a two inch layer and found that it did a great job of keeping the unruly straw in place.
But just to make sure that my new no dig garden wasn't going to blow away any time soon, I gave the whole thing another shot of water.
You can see the finished bed in the picture. OK it isn't a thing of beauty but it's all my own work and I don't mind admitting that by this time I was feeling pretty pleased with myself. The whole process had taken only an hour altogether and I could hardly wait to start planting.
Planting the 'No Dig' Vegetable Garden
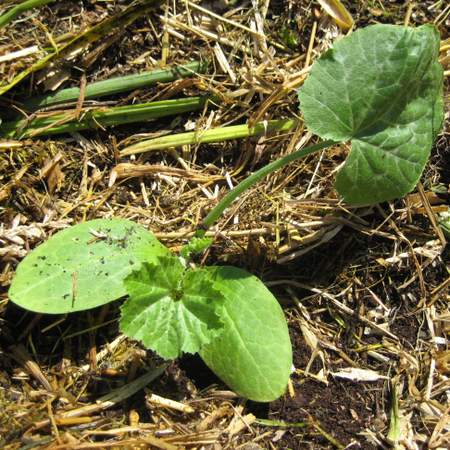
So what to plant? Ed had recommended potatoes and squashes as a first crop. As the no dig garden beds were made in May, it was too late for potatoes but I had sown some courgette and butternut squash seeds in pots and they were ready to be hardened off before planting out.
I had to wait a few days until the seedlings were ready for life in the great outdoors and even in this short time the layers of mulch had bedded down so that the no till beds looked much more a part of the earth rather than a heap of stuff thrown on top.
For the first courgette plant I followed Ed's method of scraping the mulch aside and planting through a hole in the now softened cardboard but I found this quite tricky.
Instead I made holes in the mulch, part filled them with compost, and then planted into that. This was much easier and I soon had the whole lot planted.
Did I stop there? No. I had some space left at the end of the bed so I nipped home to fetch some spare purple sprouting broccoli seedlings that I had grown. I wasn't sure if they would do well in the new no dig bed, as they like to be planted in firm soil, but I thought it was worth a go.
Two days later I was back again with the materials to convert another bed and this time I planted runner beans and climbing french beans... I can't wait to see the results!
So what are my thoughts on the practicalities of creating a no dig garden?
Well I have to say that, apart from my moment of doubt, I thoroughly enjoyed the whole experience. It was very satisfying sourcing the materials for free and the whole process was easier and more fun than digging the beds over in the traditional way.
Sure there was a bit of hard work involved in transporting the materials, but this was made worse by the fact that I had to lug bags of compost from my own garden to Mrs L's!
Also the workload should now decrease as it is simply a case of maintaining the no dig garden beds by adding further layers of mulch as necessary.
We had a heatwave just after I had finished planting and I was frankly amazed by how well the no dig garden retained moisture compared to our own garden. The beds also seemed to retain more warmth and the no dig courgettes and squashes have certainly grown much more compared to the ones planted at home.
Of course the real test will come at harvest time, but even if the yields are the same as in our own vegetable garden, they will have been achieved with far less work - and that, as I'm sure you will agree, is a major advantage!
An update
Well, it's now November and I can report that the two no dig garden beds needed very little maintenance apart from adding some damp newspaper and grass cuttings to smother any weeds that appeared.
They retained the moisture really well and the courgettes and squashes produced a pretty decent harvest, as did the beans which gave similar yields to the ones growing in our own garden.
The real surprise has been the purple sprouting broccoli which, contrary to my expectations, has grown into very upright, sturdy plants which have shown no inclination to flop over in the strong winds we have had recently and are already producing shoots - well before the same variety planted at home...
My conclusions
No dig gardening is definitely a technique that I will continue to use. It is easy and produced good results and I am already planning to start converting some of my own garden to the no dig system.
But don't just take my word for it - try it out for yourself!
Need More Information?
A quick reminder of the other 'no dig or 'no till' gardening pages on this site:
Ed explains how no dig gardening works and offers advice about which sheet mulching materials are suitable for a no dig garden. He also reveals his secrets of a successful no dig vegetable garden!
You can find more information on the ideas behind no dig gardening at No Till Gardening: Too Good to be True?
If you are new to growing vegetables, check out five easy vegetables to grow.
Home › No till gardening › Creating a no dig garden
