Home › Garden soil › Soil pH test kit
How To Use A Soil pH Test Kit

Is it worth using a soil pH test kit to test garden soil?
Yes, most definitely! I mean, why wouldn't you?
Soil pH test kits are cheap, effective and easy to use. Literally for the price of a cup of coffee and a cake you can find out whether your soil is acid, alkaline or neutral.
This makes it easy to garden more effectively and choose the right plants.
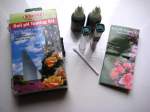
There are a number of pH test kits on the market and they all work in a broadly similar way.
The main difference is that some kits come with a ready mixed pH test solution in liquid form, while others supply the test reagent as a powder which means you will have to add distilled water.
As I never have distilled water to hand, I prefer the ready mixed ones.
Are they accurate?
I would say that most of the pH test kits available in retailers are quite accurate enough for the home gardener but some are better than others.
In the US, the Luster Leaf Rapitest range is good.
If you live in the UK I recommend the test kits made by Bosmere or Botanico.
Whichever you buy, the key to getting an accurate result is twofold and lies in careful collection of the soil sample, avoiding any contamination, and taking the reading as soon as the specified time has elapsed.
Where to buy
Most garden centres and DIY chains stock a limited range but to be honest I usually shop at Amazon who offer a wider choice and cheaper prices.
If you live in the US you can check out the range of Rapitest soil pH test kits at Amazon.com.
UK based? Shop for soil pH test kits at Amazon.co.uk
So now you've got your test kit, how do you use it?
Getting organized
First collect your equipment
You will need a clean trowel and a clean container for each sample you take. I like to use ziplock bags.
For powder-based kits you will need distilled water for the test itself.
Decide where to take the samples
Soil pH can vary in different parts of your garden either naturally or through different types and levels of cultivation. You may be able to see clear differences in colour, texture and humus content.
So aim to take a number of samples from different areas and test each one separately.
Make sure you label each sample so that you know where they have come from.
Collecting the soil samples
For each area you are sampling scrape away the top 2 inches of soil. This prevents the reading being affected by any top dressings or mulches you have applied or any accumulation of leaf litter or pine needles.
Now break up the soil to a depth of about 5 inches and take the sample from the bottom level.
Collect more than you think you will need as you will be picking out all the lumps, stones, twigs etc.

Here I've collected plenty because I am also going to carry out a quick soil identification 'feel' test.
Label each sample as you collect it - have I said this before?
Prepare your sample
Pick out any stones, roots and twigs and leave the sample to dry.

Break up the dry sample with the back of a clean teaspoon or the tip of a clean trowel, and place the specified amount in the test tube or test chamber provided.
Carry out the pH test
This stage will vary depending on the type of kit you have purchased.
A word about Barium Sulphate!
You may be confused by the references to barium sulphate below. Barium sulphate is used in soil testing as a flocculant (great word!).
It causes the fine soil particles to clump together and sink leaving a clear test solution so you can make an accurate colour comparison.
If you have a clay soil with lots of fine particles you may need to add extra barium sulphate to clear the liquid.
This is another advantage of liquid based tests where the barium sulphate powder is provided separately.
Liquid-based kits
If your kit contains a liquid test solution, you will usually have to add a scoop of the provided barium sulphate powder to the sample followed by the specified amount of test solution.
If you have a clay based soil it's useful to add extra barium sulphate right at the start.
Put the cap on the test tube and shake it well.
Leave it to settle for the required time - normally 10 minutes.
Powder-based kits
For kits containing the reagent in powder form you will have to add the specified quantity of powder (this usually contains the appropriate amount of barium sulphate as well as the reagent) followed by the required amount of distilled water.
Put the cap on the test tube and shake well to mix.
Allow to settle for the specified time - usually around 10 minutes.
Read the results
Compare the resulting colour of the solution against the supplied colour chart.
Don't leave the solution for much longer than the stated time because the colour may start to change and you won't get an accurate result.
Try to do this in good natural light but away from the glare of bright sunlight to make an accurate comparison.
And that's it - simple!
These are the results I got from my two soil samples.

The sample from the West Border (above) came up neutral which I had pretty much expected.

The soil sample from the North-east border, however, turned out to be acidic with pH 6.0.
This surprised me until I realised that I had built up the height of the area with several loads of bought in topsoil which I noticed at the time had a very high humus content.
As organic matter, such as garden compost and rotted manure, tends to lower soil pH, making it more acidic, I should have been expecting it.
However, both soils fall well within the pH range (5.5 to 7.5) acceptable to most plants so I shall just carry on as before!
More Information...
If you prefer, you can use a soil pH meter to test your soil.
Once you know the pH value of your soil you can use this information at the garden centre or nursery to choose the right plants; most plants are labelled with information about soil pH and soil type.
If you need more information about soil, you will find an overview of the subject, together with links to other soil-related pages, at healthy garden soil.
Home › Garden soil › Soil pH test kit

Recent Articles
-
Best Climbers For Sandy Soil
Feb 27, 14 07:52 AM
Climbers for sandy soil need to be able to cope with free draining conditions and relatively low soil fertility. These are my favourite climbers for sand. -
Best Perennials For Sandy Soil
Feb 26, 14 05:51 AM
The best perennials for sandy soil positively thrive in free draining soils with low fertility. These are my favourite perennials for growing in sandy soil. -
How To Use A Soil pH Test Kit
Jan 08, 14 08:19 AM
 How to use a soil pH test kit to find out if your garden soil is acid, alkaline or neutral. Soil pH kits are cheap, effective, simple to use, and are an indispensable aid to more successful gardening.