Home › Garden soil › Soil pH meter
How To Use A Soil pH Meter
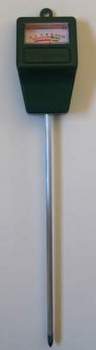
A soil pH meter is a cost effective, quick and easy-to-use way to find out if your soil is acid, alkaline or neutral.
pH meters have advantages over pH test kits in that they can be used many times over and they don't require any colour interpretation to read the results.
The type of meters I'm talking about are those readily available to the home gardener rather than the super expensive instruments aimed at professionals.
On this page you will find a brief discussion of how these meters work, how accurate they are, and two methods of using them to test your soil including the pitfalls to avoid.
The first method tests soil pH directly in your garden whilst the second tests pH in a collected soil sample.
How soil pH meters work
Alkalis dissolve in water to form negatively charged hydroxide ions. Acids, on the other hand, dissolve in water to form positively charged hydrogen ions.
The negatively charged hydroxide ions react with the positively charged hydrogen ions to cancel some, or all of them, out.
The more hydrogen ions a substance contains, the more acidic it is.
pH meters use an electrode to test the concentration of hydrogen ions in wetted soil and show the pH either digitally or by a needle on a scale.
How accurate are they?
Some pH meters give readings to within 0.2, or even 0.1, of a pH point. On the face of it this makes them more accurate than the test kits which typically give readings to within 0.5 of a pH point.
I would not rely on this degree of accuracy because there are too many variables involved in home (as opposed to laboratory) testing.
This isn't as big a problem as it seems. I'm not sure whether knowing the pH level of you soil to this degree of accuracy is important to any but the most specialized growers.
For most of us a reasonably accurate indication of pH is quite good enough.
Where to buy
Most garden centres and some DIY stores stock a limited range of pH meters but for the best choice and reasonable prices I like to shop at Amazon. I also find it helpful to read through the customer reviews.
If you live in the US, browse the range of soil pH meters at Amazon.com.
If you live in the UK, you can check out the range of soil pH meters at Amazon.co.uk.
Getting organized
Collect your equipment

You will need your soil pH meter, a clean trowel, a bottle of distilled water and some short canes to mark your chosen testing sites.
You will also need the cleaning pad that came with your meter, if none was supplied you can use a non-stick pot scourer instead (don't use wire wool as this will affect the reading), and some clean tissues or kitchen paper.
If you are going to remove soil samples for testing you will also need a clean container for each sample (large Ziploc bags come in handy here as they can easily be labelled), and a clean, deep glass or plastic container for carrying out the test. I like to use large plastic water bottles with the tops cut off.
Decide which areas to test
Soil pH typically varies in different parts of your garden. This may occur naturally or be due to different cultivation methods used over time.
You may be able to see clear differences in soil colour and texture, and higher or lower levels of organic content.
You will need to carry out a number of tests in different areas and it can be helpful to mark each test site by inserting a short cane.
Method 1: Testing pH directly in the ground
Prepare the soil
At each testing site scrape away the top 2 inches of soil. This prevents the reading being affected by any top dressings or mulches you have applied or any accumulation of leaf litter or pine needles.
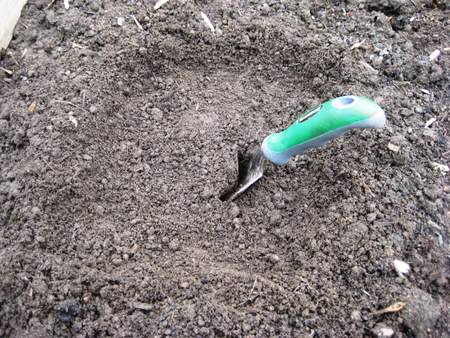
Use a clean trowel to break up the underlying soil to a depth of 5 or 6 inches, removing as many stones, leaves, twigs or bits of root as possible.
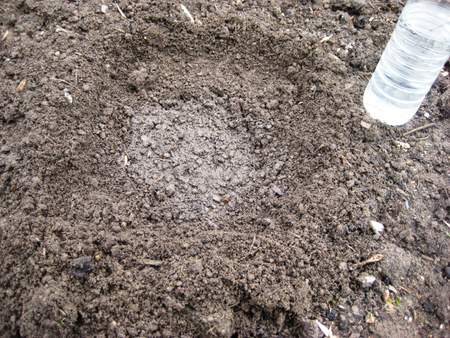
Thoroughly wet the soil with distilled water and let the excess drain through. You are looking for the consistency of firm mud.
Carry out the pH test
A build up of oxides on the probe will prevent an accurate reading so use the cleaning pad to lightly buff the probe. Use clean tissue to wipe the probe clean.
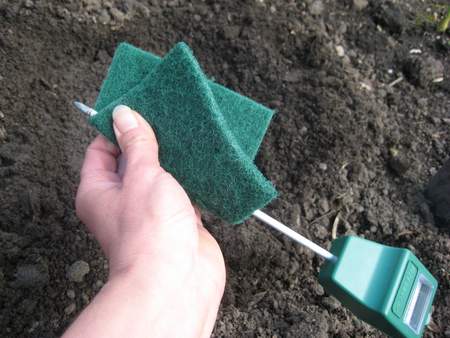
Always avoid the tip and work upwards.
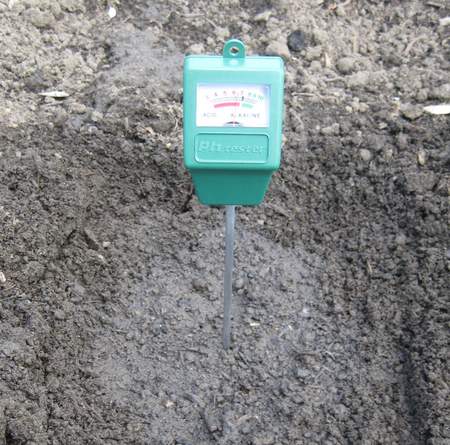
Insert the probe vertically into the testing site to a depth of about 5 inches. Do not use excessive force. If you find it won't go in easily, choose another testing site.
An accurate reading depends on a good contact being made between the probe and soil. If your test meter only has a single probe it can be helpful to gently twist it in both directions.
Wait for the time specified in the instructions (usually 60 seconds) before taking the reading.
Double check your pH reading
If you get a reading of below pH7, wipe the probe clean with tissue and reinsert in the same test site (but not in the same hole).
If your initial reading is pH7 or above, remove any soil with clean tissue, then buff and wipe as above before retesting.
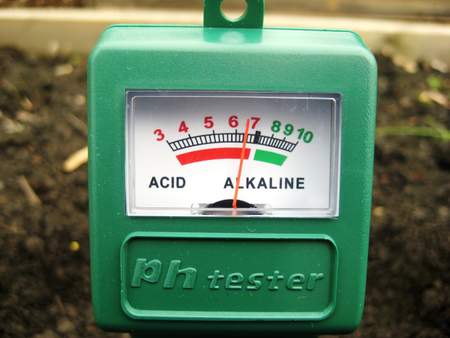
Take the final reading.
Method 2: Testing pH by taking a soil sample
Collect your soil sample
At each testing site first remove the top 2 inches of soil. Break up the soil below to a depth of 5 to 6 inches removing any obvious large stones or pieces of organic material.

Place a large sample in your clean container or Ziploc bag and label it.
Prepare your soil sample
Remove any remaining stones, leaves, twigs and the like from your sample and break it up into fine particles.

Place a pint of distilled water in your glass or plastic container and add the same volume of prepared soil. Mix thoroughly and allow to settle, or press down firmly, before pouring off the excess water. The wet soil should be quite firm.
The pH test
Carry out the pH test as described in Method 1 above.

The image above shows the final reading which is in line with the results I got by using Method 1.
What can go wrong - pitfalls to avoid
The soil is not wet enough - remember you need the consistency of firm mud.
The probe itself is oxidised - buff as described above to remove the oxidised layer and take care to store the pH meter in clean, dry conditions between uses.
The probe is not in good contact with the soil - try twisting it gently in both directions.
The probe is in contact with stones or lumps of organic matter - work through the sample area again to remove these, or use Method 2 which makes it easier to prepare a good sample.
More information...
If you would rather use a soil pH test kit to test your soil you can find instructions here.
Knowing the pH value of your soil is helpful as most garden centres and nurseries include information about soil pH and
soil type on their plant labels.
If you need more information about soil, you will find an overview of the subject, together with links to other soil-related pages, at healthy garden soil.
Home › Garden soil › Soil pH meter

Recent Articles
-
Best Climbers For Sandy Soil
Feb 27, 14 07:52 AM
Climbers for sandy soil need to be able to cope with free draining conditions and relatively low soil fertility. These are my favourite climbers for sand. -
Best Perennials For Sandy Soil
Feb 26, 14 05:51 AM
The best perennials for sandy soil positively thrive in free draining soils with low fertility. These are my favourite perennials for growing in sandy soil. -
How To Use A Soil pH Test Kit
Jan 08, 14 08:19 AM
 How to use a soil pH test kit to find out if your garden soil is acid, alkaline or neutral. Soil pH kits are cheap, effective, simple to use, and are an indispensable aid to more successful gardening.